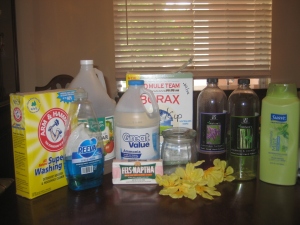
So I pulled out some of my favorites and tried a few new homemade products. Here’s what I made for her:
HM Laundry Detergent
HM Stain Remover
HM Fabric Softener on reusable Dryer Sheets
HM Gel Air Freshener
Personalized bottle of Hand Sanitizer

Here is are some of the items I used to make her gifts – out of all of them the laundry detergent is one of my all time favorites! Here’s the recipe for me it works out to about $0.015 / half cup – yes that’s right about a penny and a half per load!
Here’s what you need
1 bar Fels Naptha Soap (.97)
1 box Borax (.29 / cup)
1 box A&H Super Washing Soda (.17/cup)
Water
3 – 1 gallon jugs (empty & rinsed out, labels removed if you like)
1 medium – large pot
Spoon
grater of some kind
I will say that I don’t have a problem using my pots or kitchen equipment to do this – I wash everything really well afterwards by hand after all everything I am using is a type of cleaner! But if you want to use an old set of kitchen supplies then I’d hit up your local goodwill or thrift store.
First you need to grate your soap, put this in your pot with about 3 cups of water. Over medium heat stir until completely dissolved.
Add 1 cup each of borax and washing soda, continue to heat and stir until all the powder is dissolved, maybe 3-4 minutes.
This is where it gets hard … okay not really!
Pour the soap into your three bottles, I just eye ball it when I’m using my regular bottles because they are all about the same size and shape. A couple of times I’ve been making several smaller bottles to give away and so there have been times I will take a measuring cup and put equal amounts in all the bottles – but I’m a little OCD like that!
Final step – add water to each bottle filling each one almost to the top – you need to leave a little room for shaking. Yes you heard me right – shaking! Put the lid on tightly and SHAKE! SHAKE! SHAKE! Leave it overnight to thicken some and you are ready to go!!
You will need to give your bottle a shake before each use as it does tend to separate as it sits. When you shake the bottle you will see suds – when you wash your clothes you don’t see much/any suds – it took me a while to get past that because I don’t know about you but I always associated suds = clean. Trust me your clothes will come out just as clean as when you use commercial products but at a fraction of the cost!
And with three kids every penny counts! Well at least it is for …
This Frugal Momma
No comments:
Post a Comment